As the name of my blog indicates, I spend a lot of time thinking about home. Of course, my Heavenly Home is the one that is eternal, so that’s where I need to lay up my treasures, and that’s the one I’m striving for. But in the meantime, I have been given this tiny piece of the here-and-now—this home on the edge of town, this family, this neighborhood—in which to serve Him. And, though this is in the earthly realm, I want the things that happen here to be investments in the Heavenly realm.


Friday, October 18, 2013

CeLeBRaTe!! {Day 18 ~ Giveaway Winner and a Bunting Tutorial}


All the names went into the brown stoneware bowl.


Ron stirred the names around, reached into the bowl,


 and pulled out the name of...

wOOt wOOt!

Congratulations, Karrie!!
(If you'll send me a private email at thinkingabouthome@gmail.com, I'll get your fall bunting in the mail right away so you can use it before fall gets away from us!)


Thanks to all who entered. I wish you all could have been winners! But how about the next best thing? Why don't I teach you how to make a bunting of your own? 

Before I start, let me tell you that I have used two different procedures to make my buntings. On two of them, I have used a quicker, easier method which is good enough for me! But for the giveaway, I wanted to have a more finished, professional look, so I made it a bit differently. 

I will give the instructions for the "finished" look in my instructions. Then I will tell you the shortcuts at the end.

Here goes...


1) Gather your fabrics. 

Choose colors and prints that match those of your party or season. It is nice to vary the scale (small prints, larger prints), design (polka dots, stripes, florals, solids), and brightness (light and dark backgrounds).

If you sew a lot, you can raid your stash for coordinating fabrics. For my autumn bunting, I purchased 1/4 yard of six different fabrics, 1/2 yard (remnant, on sale) of two fabrics, and I found two scraps in my stash that coordinated. (Each 1/4 yard made two triangles.)


2) Cut out triangles.

Make a template from an 8 1/2" x 11" sheet of card stock, construction paper, or even copy paper. I folded my sheet of paper in half lengthwise, then cut off a piece at an angle, and opened it back up, resulting in an isosceles triangle. There is no "right" size, in my opinion. For one of my birthday banners, I adjusted the size of my triangle template because I only had a small piece of one of the fabrics I wanted to use. 

Fold your fabric so that there are two layers. Trace around the triangle template with a pencil. Cut on the pencil line. Each triangle will have two pieces.

My autumn bunting had 16 triangles. You can make more; you can make fewer. It depends on your space and how long you want your bunting to be.

Marking the triangles

Stack of cut pairs of triangles


3) Stitch. 

Placing right sides together, sew triangles on the two long sides, using a 1/4" seam allowance. Leave shorter side of each triangle open. 


4) Turn each triangle right side out.


5) Press seams and any wrinkles so that triangles lie flat.

Also trim any loose threads and clip corners.


6) Make binding.

Using coordinating fabric (I used leftover fabric from one of my 1/2-yard pieces), cut out strips 2 1/2" wide. Sew strips together to make one long strip, long enough to bind all of your triangles side by side and leaving enough on each end to hang your bunting. (I neglected to measure; I just laid it out until it covered the length I needed.)


Fold edge approximately 1/4" down entire length and press. Repeat on opposite side. After both edges are pressed, fold binding in half lengthwise and press again. (Yikes! I didn't take enough pictures...I don't have one of the completed binding.) 


7) Assemble bunting.

Pin each triangle to the binding, inserting it in the fold. Begin in the middle so that they are evenly spaced with the same amount of extra binding at each end. Stitch close to the edge of the binding.


Voilà!


Now for the shortcuts.

Quite honestly, this how I will make any future buntings unless I am giving them as gifts! It is a much faster process, and I am totally fine with how they look. 


(This is how the shortcut version looks up close. If you're okay with that, then you might one to use this method for your own bunting.) 


Step 1 is the same as above.

At Step 2, fold your fabric so that there are two layers, lay the shorter side of your template on the fold, and trace the edge with a pencil. Then cut out with pinking shears. (You will have a diamond shape at this point.) 

At Step 3, fold with wrong sides together, and sew a zigzag stitch to join the triangles. Easy peasy.

Omit Step 4. There are no seams to turn.

At Step 5, there are no seams to press, but you will want to press out any wrinkles.

Omit Step 6. You won't need a binding.

At Step 7, pin all of your triangles to a length of ribbon and use a zigzag stitch to attach them.


 Voilà! (again, only faster...)   


(If you have any questions about the tutorial, feel free to leave them in the comments and I'll do my best to clear things up!)

~ Linking up with Allyson @ All Our Days Link-Up #108 ~


This is Day 18 in the series CeLeBRaTe!!  Click ~here~ to see more.


Thursday, October 17, 2013

CeLeBRaTe!! {Day 17 ~ Place Cards}


Today is the last day to enter the Fall Bunting Giveaway!
(The giveaway will close at 5 pm EST.)

Click ~here~ to enter!

Giveaway closed...winner announced tomorrow!


Sometimes a special celebration calls for place cards.

Many of our holiday and birthday meals are served buffet style, and people just fill their plates and grab a seat. But if we're having a more formal meal or a dinner party, it is fun to have place cards for each guest. People enjoy finding their name at the table, and they also have a little souvenir of the occasion. I like to scout for new ideas and change things up each time. Often, place cards become a family project!

(Of course, place cards are an "extra," so don't sweat it if you don't have time or if all of your children are young or if such things stress you out. Your guests would rather have a relaxed hostess than a pretty place card!) 


If place cards are your thing, here are some ideas:

~ Last year's Thanksgiving place cards were so simple!  I bought leaf-shaped gift tags at Target's Dollar Spot and tied them onto the stemware. 


On the children's table, I simply laid them on their plates. Ben was impressed with his place card!


~ Another year, Kati made these delicious gingerbread cookie leaves and piped each guest's name in frosting.


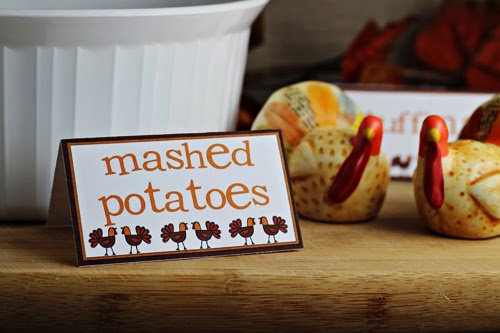
~ On another Thanksgiving, we made these turkey place cards using clip art from Martha Stewart layered over colored card stock. 


~ This one is not my picture, but we did make these place cards from sweet gum balls for a Thanksgiving dinner. (Bonus: a family walk in the woods the day before to gather the supplies!)
~ source ~


~ For this place card, I did a google image search for a vintage Easter card, layered an oval for the name using my word processing software (nowadays, I'd probably do it with PicMonkey), and printed it on cardstock. 

You could do the same thing with one of the plethora of free images at The Graphics Fairy.


There are so many ideas that I haven't tried (yet)...

~ Use paint sample strips to make place cards that coordinate with your party colors. 
~ source ~


~ I like this idea for any fall or winter table.
~ source ~

~ These cute turkey place cards are a FREE download...
~ source ~

...as are these leaf cards.
~ source ~


~ I love the simplicity of this one...and I intend to use this on my table! 

~ source ~


Do you like to use place cards for special celebrations?


This is Day 17 in the series CeLeBRaTe!!  Click ~here~ to see more.


Wednesday, October 16, 2013

CeLeBRaTe!! {Day 16 ~ Honeymoon Basket}


Have you entered the Fall Bunting Giveaway?
Click ~here~ to enter!

Giveaway closed...winner announced on Friday!


CeLeBRaTion Tip of the Day:
Make a Honeymoon Basket for newlyweds in your family.

When both of my older children got married, we presented them with a goody basket to take with them on their honeymoon.  

I bought a basket, and in the weeks leading up to the wedding, I collected little goodies to tuck inside...things that I thought they'd enjoy while they were away. 

Kristin and Brian have been married for 12 years now, and Ryan and Sarah have been married 8 1/2, long before I had a blog or the inclination to take pictures of everything, so I don't have a photo of either of the baskets I created.  This one, however, is a good representation.


What can you put in a honeymoon basket?  
  • Sparkling grape juice
  • Wine glasses (disposable ones will do)
  • Granola bars
  • Crackers
  • Scented candles
  • Small bottle of ibuprofen
  • Mints
  • Pocket packet of tissues
  • Gum
  • Hand sanitizer
  • A note or a message for the happy couple

After you fill it, wrap it in cellophane or place it in a cellophane basket bag and tie it with a pretty ribbon.

And there you have it...a practical gift to send along with the new couple, and a little reminder that you are rejoicing with them!


This is Day 16 in the series CeLeBRaTe!!  Click ~here~ to see more.


Tuesday, October 15, 2013

CeLeBRaTe!! {Day 15 ~ Celebrate? Really?}


Since I have begun writing this 31-day series on celebrations, we have celebrated three birthdays, an elderly aunt has passed away, another beloved aunt has been diagnosed with terminal cancer, a family member has had some financial reverses, my dad has been afflicted with a flare up of sciatica, and on Sunday evening our brother-in-law passed away unexpectedly. 


And I am writing about celebration?

Hmmm...did I know what was coming when I told you that this series would not be all about happy-happy-happy? 

Not at all. 

But do I still believe that "happy" is not the focus of celebration?

I really do.


cel·e·brate  /ˈseləˌbrāt/

(v.) to mark a notable occasion with gratitude and rejoicing

(synonyms: commemorate, observe, mark, keep, honor, memorialize)


So we continue to mark occasions. 

We commemorate the significance of a life. 

We allow our hearts to be grateful for His gifts. All of them. 

We pray for those who are struggling, hurting, grieving. 

We pray that His will be done. We pray that those who don't know Him are drawn to Him, and that those who do know Him are drawn nearer. 

We celebrate His mercy and His goodness in our lives.


This is Day 15 in the series CeLeBRaTe!!  Click ~here~ to see more.


Monday, October 14, 2013

CeLeBRaTe!! {Day 14 ~ Party Buntings and a Giveaway}


A few years ago, I fell in love with buntings!

A bunting says "CeLeBRaTe!!"
A bunting is a show-stopper. It's usually the first thing you notice in the party room.


I made one for a special birthday celebration, using the colors in the party plates and napkins.


Kati repurposed this same bunting to fit the Cute as a Button theme for the baby shower she gave for her friend Britni.


Last spring, I made a new one for Bekah's 12th birthday party.


When we freshened up Bekah's room in July, the bunting found a new home on her wall.


For our nautical themed Father's Day celebration this summer, we made a bunting from scrapbook paper and twine.


Today, I am opening up a giveaway for a fall bunting!

You could hang this bunting at an autumn birthday party.
(We gave it a test run at my dad's birthday party yesterday.)

You could use this fall bunting to decorate for any autumn bash.

You could even hang it somewhere in your house just to celebrate fall!


If you'd like to win this fall bunting,
simply leave a comment at the end of THIS post saying you want to have your name in the hat (or brown stoneware bowl).

You have until 5 pm on Thursday to enter your name.
I'll have Ron choose a name, and I'll announce the winner on Friday!


This is Day 14 in the series CeLeBRaTe!!  Click ~here~ to see more.


Sunday, October 13, 2013

CeLeBRaTe!! {Day 13 ~" Tune My Heart"}


Some days my heart needs to be tuned. It is out of sorts or disgruntled or stingy or even overwhelmed. And on those days, my heart is not singing His grace. Maybe I can't hear the music. Maybe I'm listening to the wrong thing. But for whatever reason, I am out of tune.  

And honestly? I can't tune myself. My hearing is distorted and my singing is dissonant. 

That's when I need to pause. To come away for a time, even a few minutes, and tune out everything else. To let Him tune my heart. As I listen to Him, He changes my focus. He changes my tune. 

And then I can sing His grace. 

Because there isn't anything else worth singing. 


Celebrating His grace today...


Come thou fount of every blessing
Tune my heart to sing Thy grace
Streams of mercy never ceasing
Call for songs of loudest praise
And teach me some melodious sonnet
Sung by flaming tongues above
I'll praise the Mount I'm fixed upon it
Mount of Thy redeeming love

Here I raise my Ebenezer
Hither by Thy help I come
Oh, and I hope by Thy good pleasure
Safely to arrive at home
Oh Jesus, sought me when a stranger
Wondering from the fold of God
He, to rescue me from danger
Interposed His precious blood

So to grace, how great a debtor
Daily I'm constrained to be
And let Thy goodness like a fetter
Bind my wandering heart to Thee
Prone to wander, Lord, I feel it
Prone to leave the God I love
Here's my heart, Lord, take and seal it
Seal it for Thy courts above


*** Giveaway on Monday! ***

This is Day 13 in the series CeLeBRaTe!!  Click ~here~ to see more.


Saturday, October 12, 2013

CeLeBRaTe!! {Day 12 ~ Celebrate Winter, Spring, and Summer}


Perhaps I don't celebrate all of the seasons with the enthusiasm I reserve for autumn. But each season has its own beauty, God has created each one, and He has promised that they will not cease as long as the earth remains...and that's reason enough to celebrate!


Ideas for celebrating winter...
  • Enjoy cozy candlelight.
  • Make soup. Try a new recipe.
  • Watch a video "project": a series, or movies with a related theme.  Some we have enjoyed are Bleak House, Anne of Green Gables, the Jane Austen movies, Cranford, Wives and Daughters, Ken Burns' documentaries.
  • Drink hot drinks. Set up a hot chocolate bar.
  • Put together a 1000-piece puzzle.
  • Begin a read aloud.


Ways to welcome spring...


Ideas for celebrating summer...


Do you celebrate the seasons?  What season makes your heart sing? 


*** Giveaway on Monday! ***


This is Day 12 in the series CeLeBRaTe!!  Click ~here~ to see more.


Related Posts Plugin for WordPress, Blogger...