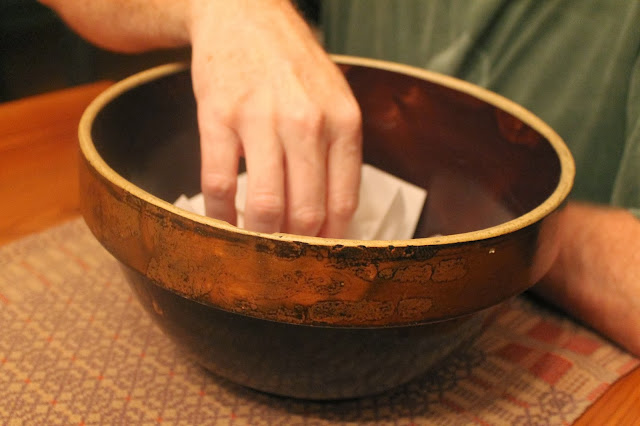
All the names went into the brown stoneware bowl.
Ron stirred the names around, reached into the bowl,
and pulled out the name of...
wOOt wOOt!
Congratulations, Karrie!!
(If you'll send me a private email at thinkingabouthome@gmail.com, I'll get your fall bunting in the mail right away so you can use it before fall gets away from us!)
Thanks to all who entered. I wish you all could have been winners! But how about the next best thing? Why don't I teach you how to make a bunting of your own?
Before I start, let me tell you that I have used two different procedures to make my buntings. On two of them, I have used a quicker, easier method which is good enough for me! But for the giveaway, I wanted to have a more finished, professional look, so I made it a bit differently.
I will give the instructions for the "finished" look in my instructions. Then I will tell you the shortcuts at the end.
Here goes...
1) Gather your fabrics.
Choose colors and prints that match those of your party or season. It is nice to vary the scale (small prints, larger prints), design (polka dots, stripes, florals, solids), and brightness (light and dark backgrounds).
If you sew a lot, you can raid your stash for coordinating fabrics. For my autumn bunting, I purchased 1/4 yard of six different fabrics, 1/2 yard (remnant, on sale) of two fabrics, and I found two scraps in my stash that coordinated. (Each 1/4 yard made two triangles.)
2) Cut out triangles.
Make a template from an 8 1/2" x 11" sheet of card stock, construction paper, or even copy paper. I folded my sheet of paper in half lengthwise, then cut off a piece at an angle, and opened it back up, resulting in an isosceles triangle. There is no "right" size, in my opinion. For one of my birthday banners, I adjusted the size of my triangle template because I only had a small piece of one of the fabrics I wanted to use.
Fold your fabric so that there are two layers. Trace around the triangle template with a pencil. Cut on the pencil line. Each triangle will have two pieces.
My autumn bunting had 16 triangles. You can make more; you can make fewer. It depends on your space and how long you want your bunting to be.
 |
| Marking the triangles |
 |
| Stack of cut pairs of triangles |
3) Stitch.
Placing right sides together, sew triangles on the two long sides, using a 1/4" seam allowance. Leave shorter side of each triangle open.
4) Turn each triangle right side out.
5) Press seams and any wrinkles so that triangles lie flat.
Also trim any loose threads and clip corners.
6) Make binding.
Using coordinating fabric (I used leftover fabric from one of my 1/2-yard pieces), cut out strips 2 1/2" wide. Sew strips together to make one long strip, long enough to bind all of your triangles side by side and leaving enough on each end to hang your bunting. (I neglected to measure; I just laid it out until it covered the length I needed.)
Fold edge approximately 1/4" down entire length and press. Repeat on opposite side. After both edges are pressed, fold binding in half lengthwise and press again. (Yikes! I didn't take enough pictures...I don't have one of the completed binding.)
7) Assemble bunting.
Pin each triangle to the binding, inserting it in the fold. Begin in the middle so that they are evenly spaced with the same amount of extra binding at each end. Stitch close to the edge of the binding.
Voilà!
Now for the shortcuts.
Quite honestly, this how I will make any future buntings unless I am giving them as gifts! It is a much faster process, and I am totally fine with how they look.
(This is how the shortcut version looks up close. If you're okay with that, then you might one to use this method for your own bunting.)
Step 1 is the same as above.
At Step 2, fold your fabric so that there are two layers, lay the shorter side of your template on the fold, and trace the edge with a pencil. Then cut out with pinking shears. (You will have a diamond shape at this point.)
At Step 3, fold with wrong sides together, and sew a zigzag stitch to join the triangles. Easy peasy.
Omit Step 4. There are no seams to turn.
At Step 5, there are no seams to press, but you will want to press out any wrinkles.
Omit Step 6. You won't need a binding.
At Step 7, pin all of your triangles to a length of ribbon and use a zigzag stitch to attach them.
Voilà! (again, only faster...)
(If you have any questions about the tutorial, feel free to leave them in the comments and I'll do my best to clear things up!)
This is Day 18 in the series CeLeBRaTe!! Click ~here~ to see more.


Congrats to Karrie!
ReplyDeleteThanks for this tutorial! I like both ways and foresee myself making some in the future!
Deanna
Congrats to Karrie! And thanks Cheryl for the tutorial! I've made paper buntings on the "fly" but it would be nice to make one that would last!
ReplyDeleteKim :-)
Thanks for the tutorial and for linking up :)
ReplyDeleteCongratulations to Karrie, your tutorial looks so simple, and fun, thanks for sharing.
ReplyDeleteRead you last post on the place cards, loved all of them. Thanks for sharing.
Sue
I've done them both ways, but I've never flipped the triangle! Good heavens! I do wish that I had paid attention in Geometry class. Hearty congrats to Karrie!
ReplyDeleteCongratulations to the lucky winner! I have always meant to make some bunting and I never have gotten around to it, LOL.
ReplyDeleteWhat a great tutorial! Now to just get around to it.....
ReplyDelete